


You want to set up a 1080p hd digital signage motherboard, but it might seem hard at first. Many new users have trouble with tech problems or get upset by hardware and software errors. Changing and controlling content can also look hard. If you want things to go well, I suggest the ShiMeta AIBOX-3588M for strong performance. This 1080p hd digital signage motherboard works well for digital signage jobs. You can follow easy steps and skip common mistakes. With the right 1080p hd digital signage motherboard, you set up your screen fast and keep it working. Even if you are new, you can learn to use the 1080p hd digital signage motherboard.
You want to start your installation guide with the right tools. The ShiMeta AIBOX-3588M is a smart choice for your digital display board. You need to get everything ready before you begin. Here’s a quick list to help you prepare for your digital signage tutorial:
You can find most of these items at a hardware store. Make sure you have all the tools nearby. This step saves you time and keeps your installation smooth.
Safety comes first in any installation. You should clear your workspace and remove anything that might get in your way. Put on gloves and safety glasses before you start working. If you need a ladder, check that it stands firm and does not wobble. You want to avoid slips or falls during your signage setup.
Tip: Always unplug your digital display board before you touch any wires or cables. This keeps you safe from electric shocks.
Keep your tools organized. Place them where you can reach them easily. Good lighting helps you see what you are doing. You want to work in a space that feels comfortable and safe.
Think about where you want your digital display board to go. Pick a spot that people can see easily. The location should be close to a power outlet. You want to avoid long cables running across the floor. Use a stud finder to check the wall for strong support. Your digital display board needs a solid mount to stay secure.
Check the height and angle before you install. You want everyone to see the screen clearly. If you plan well, your installation will look professional and work well for a long time.
This installation guide helps you get ready for a smooth setup. With the right tools, a safe workspace, and a good plan, you can install your digital display board without stress. The ShiMeta AIBOX-3588M makes your digital signage project easier and more reliable.
When you pick hardware and software, you need a motherboard that fits your project. The ShiMeta AIBOX-3588M is a great choice for digital display board setups. It gives strong performance and smooth pictures. Here is a quick table with its main specs:
| Specification | Details |
|---|---|
| Processor | RK3588 |
| AI Computing Power | 6TOPS |
| Display Capability | 8K UHD |
| Multi-OS Support | Yes |
| Behavior Recognition | Supported |
The RK3588 processor is powerful and has 6T computing power. This lets your digital display board use advanced features like behavior recognition. The AIBOX-3588M works with many operating systems. You can use Android or OpenHarmony. This makes picking hardware and software easier.
Your digital display board should work with many screens and devices. The AIBOX-3588M supports HDMI 8K output. It works with most new screens. When you pick hardware and software, check if your screen uses HDMI or VGA. This helps you get the best picture.
You can add cameras, speakers, or touch panels to your digital display board. The AIBOX-3588M has many ports for these devices. You get a setup that fits what you need. Always match your devices to your motherboard for smooth use.
Tip: Test your digital display board with all devices before you finish. This step saves time and stops problems later.
Buy your digital display board parts from trusted sellers. Here are some choices you can look at:
| Model | Features |
|---|---|
| DS-352B | Small 1080P digital signage motherboard, quad-core CPU, HDMI-IN, LVDS output, Android 9. |
| DS-352A | Quad-core CPU, Android 9 OS, HDMI-IN, LVDS display output, many I/O ports. |
| Cost-effective | Stable Full HD output, good for menu boards and ads. |
Pick suppliers with good reviews and support. This helps you get good parts for your digital display board. Good sourcing keeps your digital signage working well.

Are you ready to put up your screens? You want your digital display board to last. You should follow some smart steps. The ShiMeta AIBOX-3588M has dustproof and shockproof features. You still need to install it the right way. First, choose a strong box for your motherboard. This keeps your equipment safe from dust and bumps.
Here’s a table to help you remember how to keep your digital signage safe:
| Best Practice | Description |
|---|---|
| Correct Enclosure Installation | Protects your digital display board and helps it last longer. |
| Proper Ventilation | Stops overheating and keeps your screens working well. |
| Use of Appropriate Tools | Makes your installation safe and easy. |
When you put up the digital display board, use mounts that absorb shocks. These help stop damage from shaking or bumps. Leave space for air vents. Heat can build up inside your signage. Air needs to move so things stay cool. Use a level to check your screens are straight. If you do these things, your digital signage will look good and work well.
Tip: Always check that your mounting is steady before you finish. A secure digital display board means fewer problems later.
Now you need to connect the power and video cables. This step helps you get the best 1080p HD output. Use the right cables for your digital display board. HDMI cables are best because they carry sound and picture. DVI and DisplayPort cables also work well for digital signage installation.
Here’s a table with the best cable types for your screens:
| Cable Type | Description |
|---|---|
| HDMI | Carries sound and picture in one cable. Great for digital signage installation. |
| DVI | Sends clear digital video signals. Good for digital displays. |
| DisplayPort | Connects computers to screens or TVs. Works well for digital display board setups. |
Keep your cables neat when you connect them. Messy cables can make your digital signage installation look bad. Loose cables can cause accidents and make fixing things hard. Do not pinch cables and make sure plugs are tight. If you use adapters, pick good ones so your screens show clear images.
Here’s a checklist to help you avoid mistakes:
Note: Messy cables can break your equipment and make your digital signage installation look sloppy.
You can make your digital signage installation better by adding devices. The ShiMeta AIBOX-3588M works with many devices. You can change your digital display board to fit your needs. You might want to add cameras, speakers, or touch panels. These help you use your screens in more ways.
Here’s a table with common devices for digital display board setups:
| Peripheral Type | Description |
|---|---|
| Display Outputs | LVDS output and HDMI input for mounting the displays. |
| USB Ports | Four USB ports, including USB 3.0, for fast connections. |
| Serial Ports | Two RS232 ports for extra communication. |
| IIC Ports | One IIC port for more connections. |
| Built-in Connectivity | WiFi/BT and Ethernet for networked signage. |
| GPIO Ports | Four GPIO ports for different devices. |
Plug in your devices before you finish your digital signage installation. Test each one to make sure it works with your digital display board. If you want smart features, connect cameras or sensors. For screens you can touch, add touch panels or speakers. The right devices make your digital signage installation special.
Tip: Always test your devices with your digital display board before you finish. This step saves time and helps you avoid problems later.
You have finished the main steps for putting up screens, connecting cables, and adding devices. Your digital signage installation is almost done. If you follow this digital signage tutorial, your screens will look great and work well.
You have finished connecting your digital display board and all the cables. Now, it is time to power on your system. Plug in the power cable and switch on your digital signage installation. You should see lights on the motherboard and the screens. If nothing happens, check the power source and make sure the cables are secure. Sometimes, a loose plug can stop your digital displays from turning on. Wait a few seconds for the system to boot up. You might see a logo or a welcome screen.
Tip: If your digital display board does not start, double-check the power switch and look for any signs of damage.
Once your digital signage installation powers up, you need to set the right display resolution. Go to the settings menu on your digital display board. Choose 1080p HD for the best picture quality. This makes your screens look sharp and clear. If you use the ShiMeta AIBOX-3588M, you can also try higher resolutions, but 1080p works well for most signage. Adjust the brightness and contrast so your digital displays are easy to see. Test the screen by showing a sample image or video. Make sure the colors look good and the text is easy to read.
Note: If the picture looks blurry, check the cable connections and try changing the resolution settings.
Sometimes, your digital display board might not work right away. Here are some steps you can follow to fix common problems:
If your screens still do not work, look at the user manual or ask for help from support. Most issues can be solved with these steps. You want your digital signage installation to run smoothly, so take your time and check each part.
😊 Stay calm and patient. Troubleshooting helps you learn more about your digital display board and keeps your installation working well.
Getting your digital signage ready is more than just putting in hardware and software. You also need to set up your system so it works well. This part of the digital signage tutorial shows you the main steps.
You want your digital signage installation to be fast and stable. First, go into the BIOS. Restart your system and press a key like Delete or F2. If there is a new BIOS version, update it with a USB drive. Turn on UEFI Boot Mode for faster starts. Turn on Hyper-Threading and Turbo Boost in the CPU settings. Set your RAM to use XMP Profiles for better speed. If you use SSDs, turn on AHCI Mode and TRIM support. Turn off C-States for less delay. Pick Performance Mode to keep your system running. Save your changes and check if your system is stable. Good BIOS setup helps your digital displays work well.
Tip: Good BIOS and firmware settings help your digital signage content management work better.
Now you need to put in the right content management software. The ShiMeta Android Digital Signage Software works well with the AIBOX-3588M. This software lets you upload, schedule, and control your digital content easily. You can also use ShiMeta’s software for facial recognition and smart monitoring. These tools help you manage your digital screens and keep your signage safe. After you install the software, set up the media player. Make your playlists and test your content on the screens. This step makes setting up your screens with the cms easy.
A safe network keeps your digital signage protected. Use wired Ethernet for a steady connection. Set up Wi-Fi with WPA2-PSK and AES for strong security. Keep your digital signage systems on a separate network. Use VPNs to keep data safe. Add firewalls and intrusion detection to watch for threats. Check your network often to find and fix problems.
| Network Security Measures | Description |
|---|---|
| Use firewalls and intrusion detection | Protect against threats and watch for strange activity |
| Use the newest Wi-Fi encryption | WPA2-PSK with AES for wireless security |
| Keep the network separate | Isolate digital signage systems |
| Use VPNs | Keep data safe between devices and servers |
| Use wired connections | More steady and faster for digital signage |
After you set up the network, finish setting up the media player and your screens with the cms. This step makes sure your digital content shows up right and stays safe.
Note: A strong network setup keeps your digital signage working well and your content safe.
This tutorial helps you get the best from your digital signage installation. With the right software, network, and settings, your digital displays will always look good.
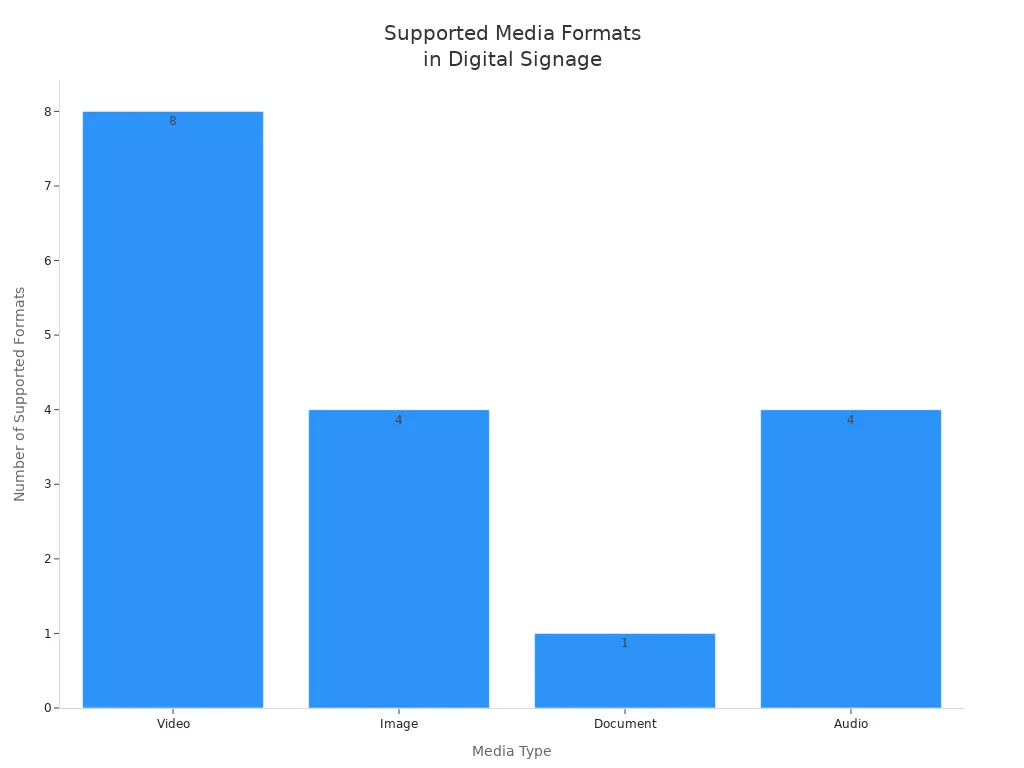
You want your digital display to look clear and new. Start by putting media files into your signage system. Most digital signage platforms let you use many file types. Here is a table to help you pick the right format for your content updates:
| Media Type | Supported Formats |
|---|---|
| Video | MP4, AVI, MOV, GIF, MKV, M4V, WEBM, MPEG |
| Image | JPG, PNG, GIF, BMP |
| Document | |
| Audio | MP3, WAV, OGG, M4R |
You can drag and drop files into the digital signage software. Make sure your images and videos fit the screen size for the best look. If you want your display to stay new, upload new content updates often.
Tip: Pick high-quality images and videos for a sharp digital look.
You want your digital signage to show the right message at the right time. Scheduling content updates helps you plan what plays and when. Most digital signage software lets you set rules for automatic playback. You can pick times for your content updates, like morning ads or evening news.
People like easy scheduling tools. You can set up repeating events, control on and off hours, and pick when your audience sees each message. If you work with others, workflow management lets everyone help with content updates without mix-ups.
Note: Smart scheduling saves time and keeps your digital signage working well.
You want to know if your digital content updates reach people. Monitoring tools help you check playback and device health. Here are some ways you can see how your digital signage is doing:
You can also check things like how many people watch and if sales go up. Some systems count people to see how many look at your digital signage. If you want better content updates, try different messages and see what works best.
😊 Checking your digital signage often helps you fix problems fast and keeps your system working well.
You want your digital display board to look sharp and bright. Start by checking each screen after you finish your digital signage installation. Play a sample video or image in 1080p HD. Look for clear colors and smooth motion. If you see blurry spots or stretched designs, check your settings. Sometimes, content does not fit the screen because the size is wrong. Adjust the resolution until your digital displays show everything just right. Use a simple checklist to help:
Tip: Always test with real content before you launch your signage. This helps you catch problems early.
You might run into a few problems during final testing. Here are some issues people see most often:
If you spot any of these, fix them right away. Double-check your mounts and make sure your digital display board sits flat. Sync your content again if updates do not appear. Always match your content size to your screens.
You want your digital signage to run smoothly every day. Try these steps to keep your system fast and reliable:
😊 A little care goes a long way. Keep your digital display board in top shape and your signage will always impress.
You want your digital display boards to work well and look bright. Checking them often helps you find problems early. Here is an easy plan you can use: Every month, look at your boards for dust or loose wires. Check for any damage on the outside. Every three months, clean the vents and update your digital software. This keeps things running smoothly. Once a year, do a full checkup. Make sure every part works right and look for hidden problems.
Tip: Set reminders so you remember to do each check.
Updating your digital signage software and firmware keeps your system safe and fast. Here are some good steps to follow: First, read the update notes to see what is new. Make sure the update works with your hardware. Always save your files and settings before you start. Pick a time when not many people use the boards. Tell your team about the update. Try the update in a safe place first. Follow the maker’s instructions. Use steady power so the update does not stop. Watch the update as it happens. Write down what you do so you remember later. Have a way to go back if something goes wrong.
😊 Updates help your digital display boards stay safe and work better.
You want your digital display boards to last a long time. Where you put them and how you care for them matters. Look at these tables and tips:
| Condition | Importance |
|---|---|
| Outdoor Displays | Must handle rain, snow, and sunlight. |
| Indoor Displays | Need stable temperatures to avoid overheating or corrosion. |
| Factor | Impact on Reliability |
|---|---|
| Temperature | Too much heat can damage digital components and shorten their life. |
| Humidity | High moisture causes corrosion and weakens performance. |
| Dust | Dust blocks airflow and makes screens look dull. |
Note: Keeping your digital signage clean, cool, and dry helps it work better and last longer.
You now know how to put in a 1080p HD digital signage motherboard by following each step. The ShiMeta AIBOX-3588M helps you manage power, keeps your system safe, and lets you connect many things for your digital signs.
| Feature | Benefit |
|---|---|
| HDMI 8K Output | Clear pictures for any signage screen |
| Wi-Fi 6 | Fast and steady wireless connection |
| Android 12 | Simple, smart interface that is easy to use |
Check your system often and update it to keep it working well. If something goes wrong, look at the power, network cables, and display cards first.
You can update the firmware by downloading the latest version from ShiMeta’s website. Use a USB drive to load the update. Follow the on-screen steps. Always back up your settings first.
First, check the power cable and HDMI connection. Make sure the display is on the right input. Try restarting the system. If the problem stays, test with another cable or screen.
Yes, you can connect both. The AIBOX-3588M supports Wi-Fi 6 and Ethernet. This gives you a backup if one network fails. You get a more stable connection for your digital signage.
| Media Type | Best Formats |
|---|---|
| Video | MP4, MOV |
| Image | JPG, PNG |
| Audio | MP3, WAV |
Stick to these formats for smooth playback and easy uploads.


